Spotlights represent a light that has position, direction, and perhaps an FOV and some kind of aspect ratio. Through projective texturing, we can make spotlights that have arbitrary light intensities, rather than relying on uniform values or shader functions to compute light intensity. That is all well and good for spotlights, but there are other forms of light that might want varying intensities.
It doesn't really make sense to vary the light intensity from a directional light. After all, the whole point of directional lights is that they are infinitely far away, so all of the light from them is uniform, in both intensity and direction.
Varying the intensity of a point light is a more reasonable possibility. We can vary the point light's intensity based on one of two possible parameters: the position of the light and the direction from the light towards a point in the scene. The latter seems far more useful; it represents a light that may cast more or less brightly in different directions.
To do this, what we need is a texture that we can effectively access via a direction. While there are ways to convert a 3D vector direction into a 2D texture coordinate, we will not use any of them. We will instead use a special texture type creates specifically for exactly this sort of thing.
The common term for this kind of texture is cube map, even though it is a texture rather than a mapping of a texture. A cube map texture is a texture where every mipmap level is 6 2D images, not merely one. Each of the 6 images represents one of the 6 faces of a cube. The texture coordinates for a cube map are a 3D vector direction; the texture sampling hardware selects which face to sample from and which texel to pick based on the direction.
It is important to know how the 6 faces of the cube map fit together. OpenGL defines the 6 faces based on the X, Y, and Z axes, in the positive and negative directions. This diagram explains the orientation of the S and T coordinate axes of each of the faces, relative to the direction of the faces in the cube.

This information is vital for knowing how to construct the various faces of a cube map. Notice that the four sides of the cube, not the top and bottom, are actually upside down. The T coordinate goes towards -Y rather than the more intuitive +Y.
To use a cube map to specify the light intensity changes for a point light, we simply need to do the following. First, we get the direction from the light to the surface point of interest. Then we use that direction to sample from the cube map. From there, everything is normal.
The issue is getting the direction from the light to the surface point. Before, a point light had no orientation, and this made sense. It cast light uniformly in all directions, so even if it had an orientation, you would never be able to tell it was there. Now that our light intensity can vary, the point light now needs to be able to orient the cube map.
The easiest way to handle this is a simple transformation trick. The position and orientation of the light represents a space. If we transform the position of objects into that space, then the direction from the light can easily be obtained. The light's position relative to itself is zero, after all. So we need to transform positions from some space into the light's space. We will see exactly how this is done momentarily.
Cube map point lights are implemented in the Cube Point Light project. This puts a fixed point light using a cube map in the middle of the scene. The orientation of the light can be changed with the right mouse button.
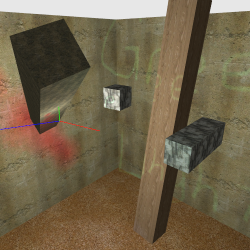
This cube texture has various different light arrangements on the different sides. One side even has green text on it. As before, you can use the G key to toggle the non-cube map lights off.
Pressing the 2 key switches to a texture that looks somewhat resembles a planetarium show. Pressing 1 switches back to the first texture.
We have seen how 2D textures get loaded over the course of 3 tutorials now, so we use GL Image's functions for creating a texture directly from ImageSet. Cube map textures require special handling, so let's look at this now.
Example 17.8. Cube Texture Loading
std::string filename(Framework::FindFileOrThrow(g_texDefs[tex].filename));
std::auto_ptr<glimg::ImageSet> pImageSet(glimg::loaders::dds::LoadFromFile(filename.c_str()));

glBindTexture(GL_TEXTURE_CUBE_MAP, g_lightTextures[tex]);
glTexParameteri(GL_TEXTURE_CUBE_MAP, GL_TEXTURE_BASE_LEVEL, 0);
glTexParameteri(GL_TEXTURE_CUBE_MAP, GL_TEXTURE_MAX_LEVEL, 0);

glimg::Dimensions dims = pImageSet->GetDimensions();
GLenum imageFormat = (GLenum)glimg::GetInternalFormat(pImageSet->GetFormat(), 0);

for(int face = 0; face < 6; ++face)
{
    glimg::SingleImage img = pImageSet->GetImage(0, 0, face);
    glCompressedTexImage2D(GL_TEXTURE_CUBE_MAP_POSITIVE_X + face,
        0, imageFormat, dims.width, dims.height, 0,
        img.GetImageByteSize(), img.GetImageData());
}

glBindTexture(GL_TEXTURE_CUBE_MAP, 0);
The DDS format is one of the few image file formats that can actually store all of the faces of a cube map. Similarly, the glimg::ImageSet class can store cube map faces.
The first step after loading the cube map faces is to bind the texture to the
GL_TEXTURE_CUBE_MAP texture binding target. Since this cube
map is not mipmapped (yes, cube maps can have mipmaps), we set the base and max
mipmap levels to zero. The call to glimg::GetInternalFormat is
used to allow GL Image to tell us the OpenGL image format that corresponds to the
format of the loaded texture data.
From there, we loop over the 6 faces of the texture, get the
SingleImage for that face, and load each face into the OpenGL
texture. For the moment, pretend the call to
glCompressedTexImage2D is a call to
glTexImage2D; they do similar things, but the final few
parameters are different. It may seem odd to call a TexImage2D function when we are
uploading to a cube map texture. After all, a cube map texture is a completely
different texture type from 2D textures.
However, the “TexImage” family of functions specify the dimensionality of the image data they are allocating and uploading, not the specific texture type. This is a bit confusing; it's easiest to think of it as creating an “Image” of a given dimensionality. Since a cube map is simply 6 sets of 2D image images, it uses the “TexImage2D” functions to allocate the faces and mipmaps. Which face is specified by the first parameter.
OpenGL has six enumerators of the form
GL_TEXTURE_CUBE_MAP_POSITIVE/NEGATIVE_X/Y/Z. These
enumerators are ordered, starting with positive X, so we can loop through all of
them by adding the numbers [0, 5] to the positive X enumerator. That is what we do
above. The order of these enumerators is:
-
POSITIVE_X
-
NEGATIVE_X
-
POSITIVE_Y
-
NEGATIVE_Y
-
POSITIVE_Z
-
NEGATIVE_Z
This mirrors the order that the ImageSet stores them in (and stored in DDS files, for that matter).
The samplers for cube map textures also needs some adjustment:
glSamplerParameteri(g_samplers[0], GL_TEXTURE_WRAP_S, GL_CLAMP_TO_EDGE);
glSamplerParameteri(g_samplers[0], GL_TEXTURE_WRAP_T, GL_CLAMP_TO_EDGE);
glSamplerParameteri(g_samplers[0], GL_TEXTURE_WRAP_R, GL_CLAMP_TO_EDGE);
Cube maps take 3D texture coordinates, so wrap modes must be specified for each of
the three dimensions of texture coordinates. Since this cube map has no mipmaps, the
filtering is simply set to GL_LINEAR.
Now we will take a look at why we are using
glCompressedTexImage2D. And that requires a discussion of
image formats and sizes.
Images take up a lot of memory. And while disk space and even main memory are fairly generous these days, GPU memory is always at a premium. Especially if you have lots of textures and those textures are quite large. The smaller that texture data can be, the more and larger textures you can have in a complex scene.
The first stop for making this data smaller is to use a smaller image format. For
example, the standard RGB color format stores each channel as an 8-bit unsigned
integer. This is usually padded out to make it 4-byte aligned, or a fourth component
(alpha) is added, making for an RGBA color. That's 32-bits per texel, which is what
GL_RGBA8 specifies. A first pass for making this data smaller
is to store it with fewer bits. OpenGL provides GL_RGB565 for
those who do not need the fourth component, or GL_RGBA4 for those
who do. Both of these use 16-bits per texel.
They both also can produce unpleasant visual artifacts for the textures. Plus,
OpenGL does not allow such textures to be in the sRGB colorspace; there is no
GL_SRGB565 format.
For files, this is a solved problem. There are a number of traditional compressed image formats: PNG, JPEG, GIF, etc. Some are lossless, meaning that the exact input image can be reconstructed. Others are lossy, which means that only an approximation of the image can be returned. Either way, these all formats have their benefits and downsides. But they are all better, in terms of visual quality and space storage, than using 16-bit per texel image formats.
They also have one other thing in common: they are absolutely terrible for textures, in terms of GPU hardware. These formats are designed to be decompressed all at once; you decompress the entire image when you want to see it. GPUs don't want to do that. GPUs generally access textures in pieces; they access certain sections of a mipmap level, then access other sections, etc. GPUs gain their performance by being incredibly parallel: multiple different invocations of fragment shaders can be running simultaneously. All of them can be accessing different textures and so forth.
Stopping that processes to decompress a 50KB PNG would pretty much destroy rendering performance entirely. These formats may be fine for storing files on disk. But they are simply not good formats for being stored compressed in graphics memory.
Instead, there are special formats designed specifically for compressing textures. These texture compression formats are designed specifically to be friendly for texture accesses. It is easy to find the exact piece of memory that stores the data for a specific texel. It takes no more than 64 bits of data to decompress any one texel. And so forth. These all combine to make texture compression formats useful for saving graphics card memory, while maintaining reasonable image quality.
The regular glTexImage2D function is not capable of directly
uploading compressed texture data. The pixel transfer information, the last three
parameters of glTexImage2D, is simply not appropriate for
dealing with compressed texture data. Therefore, OpenGL uses a different function
for uploading texture data that is already compressed.
glCompressedTexImage2D(GL_TEXTURE_CUBE_MAP_POSITIVE_X + face,
    0, imageFormat, dims.width, dims.height, 0,
    img.GetImageByteSize(), img.GetImageData());
Instead of taking OpenGL enums that define what the format of the compressed data
is, glCompressedTexImage2D's last two parameters are very
simple. They specify how big the compressed image data is in bytes and provide a
pointer to that image data. That is because
glCompressedTexImage2D does not allow for format
conversion; the format of the pixel data passed to it must exactly match what the
image format says it is. This also means that the
GL_UNPACK_ALIGNMENT has no effect on compressed texture
uploads.
Creating the cube map texture was just the first step. The next step is to do the necessary transformations. Recall that the goal is to transform the vertex positions into the space of the texture, defined relative to world space by a position and orientation. However, we ran into a problem previously, because the scene graph only provides a model-to-camera transformation matrix.
This problem still exists, and we will solve it in exactly the same way. We will generate a matrix that goes from camera space to our cube map light's space.
Example 17.9. View Camera to Light Cube Texture
glutil::MatrixStack lightProjStack;
lightProjStack.ApplyMatrix(glm::inverse(lightView));
lightProjStack.ApplyMatrix(glm::inverse(cameraMatrix));

g_lightProjMatBinder.SetValue(lightProjStack.Top());

glm::vec4 worldLightPos = lightView[3];
glm::vec3 lightPos = glm::vec3(cameraMatrix * worldLightPos);

g_camLightPosBinder.SetValue(lightPos);
This code is rather simpler than the prior time. Again reading bottom up, we
transform by the inverse of the world-to-camera matrix, then we transform by the
inverse of the light matrix. The lightView matrix is inverted
because the matrix is ordinarily designed to go from light space to world space. So
we invert it to get the world-to-light transform. The light's position in world
space is taken similarly.
The vertex shader (cubeLight.vert) is about what you would expect:
lightSpacePosition = (cameraToLightProjMatrix * vec4(cameraSpacePosition, 1.0)).xyz;
The lightSpacePosition is output from the vertex shader and
interpolated. Again we find that this interpolates just fine, so there is no need to
do this transformation per-fragment.
The fragment shader code (cubeLight.frag) is pretty simple.
First, we have to define our GLSL samplers:
uniform sampler2D diffuseColorTex;
uniform samplerCube lightCubeTex;
Because cube maps are a different texture type, they have a different GLSL sampler type as well. Attempting to use texture with the one type on a sampler that uses a different type results in unpleasantness. It's usually easy enough to keep these things straight, but it can be a source of errors or non-rendering.
The code that fetches from the cube texture is as follows:
PerLight currLight;
currLight.cameraSpaceLightPos = vec4(cameraSpaceProjLightPos, 1.0);

vec3 dirFromLight = normalize(lightSpacePosition);
currLight.lightIntensity =
    texture(lightCubeTex, dirFromLight) * 6.0f;
We simply normalize the light-space position, since the cube map's space has the
light position at the origin. We then use the texture to access
the cubemap, the same one we used for 2D textures. This is possible because GLSL
overloads the texture based on the type of sampler. So when
texture is passed a samplerCube, it expects a
vec3 texture coordinate.