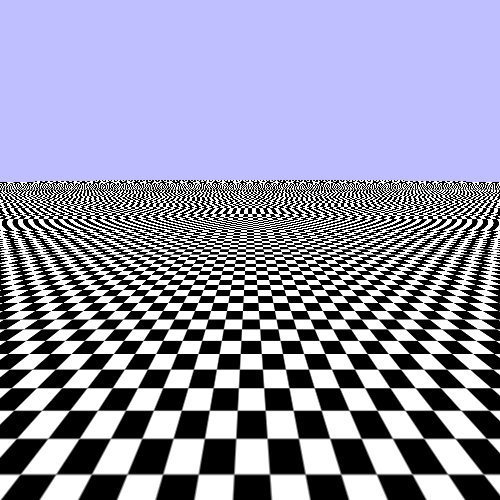
While this example certainly draws a checkerboard, you can see that there are some visual issues. We will start finding solutions to this with the least obvious glitches first.
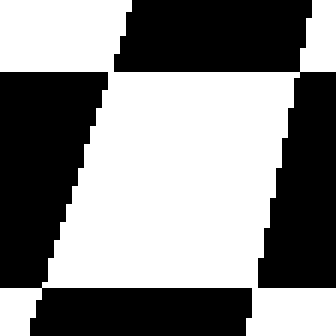
Take a look at one of the squares at the very bottom of the screen. Notice how the line looks jagged as it moves to the left and right. You can see the pixels of it sort of crawl up and down as it shifts around on the plane.
This is caused by the discrete nature of our texture accessing. The texture
coordinates are all in floating-point values. The GLSL texture
function internally converts these texture coordinates to specific texel values within
the texture. So what value do you get if the texture coordinate lands halfway between
two texels?
That is governed by a process called texture filtering. Filtering can happen in two directions: magnification and minification. Magnification happens when the texture mapping makes the texture appear bigger in screen space than its actual resolution. If you get closer to the texture, relative to its mapping, then the texture is magnified relative to its natural resolution. Minification is the opposite: when the texture is being shrunken relative to its natural resolution.
In OpenGL, magnification and minification filtering are each set independently. That
is what the GL_TEXTURE_MAG_FILTER and
GL_TEXTURE_MIN_FILTER sampler parameters control. We are
currently using GL_NEAREST for both; this is called
nearest filtering. This mode means that each texture
coordinate picks the texel value that it is nearest to. For our checkerboard, that means
that we will get either black or white.
Now this may sound fine, since our texture is a checkerboard and only has two actual colors. However, it is exactly this discrete sampling that gives rise to the pixel crawl effect. A texture coordinate that is half-way between the white and the black is either white or black; a small change in the camera causes an instant pop from black to white or vice-versa.
Each fragment being rendered takes up a certain area of space on the screen: the area of the destination pixel for that fragment. The texture mapping of the rendered surface to the texture gives a texture coordinate for each point on the surface. But a pixel is not a single, infinitely small point on the surface; it represents some finite area of the surface.
Therefore, we can use the texture mapping in reverse. We can take the four corners of
a pixel area and find the texture coordinates from them. The area of this 4-sided
figure, in the space of the texture, is the area of the texture that is being mapped to
that location on the screen. With a perfect texture accessing system, the value we get
from the GLSL texture function would be the average value of the
colors in that area.
The dot represents the texture coordinate's location on the texture. The box is the area that the fragment covers. The problem happens because a fragment area mapped into the texture's space may cover some white area and some black area. Since nearest only picks a single texel, which is either black or white, it does not accurately represent the mapped area of the fragment.
One obvious way to smooth out the differences is to do exactly that. Instead of
picking a single sample for each texture coordinate, pick the nearest 4 samples and then
interpolate the values based on how close they each are to the texture coordinate. To do
this, we set the magnification and minification filters to
GL_LINEAR.
glSamplerParameteri(g_samplers[1], GL_TEXTURE_MAG_FILTER, GL_LINEAR);
glSamplerParameteri(g_samplers[1], GL_TEXTURE_MIN_FILTER, GL_LINEAR);
This is called, surprisingly enough, linear filtering. In our tutorial, press the 2 key to see what linear filtering looks like; press 1 to go back to nearest sampling.
That looks much better for the squares close to the camera. It creates a bit of fuzziness, but this is generally a lot easier for the viewer to tolerate than pixel crawl. Human vision tends to be attracted to movement, and false movement like dot crawl can be distracting.

